Member Management
The My Team section in Mera Monitor is your central hub for managing users within your organization. Here you can view member details, add new members individually or in bulk, and manage departments.
- Viewing Members
- Adding Members Individually
- Bulk Uploading Members
The primary view within My Team > Members provides a comprehensive overview and management interface for all users in your organization or assigned teams.
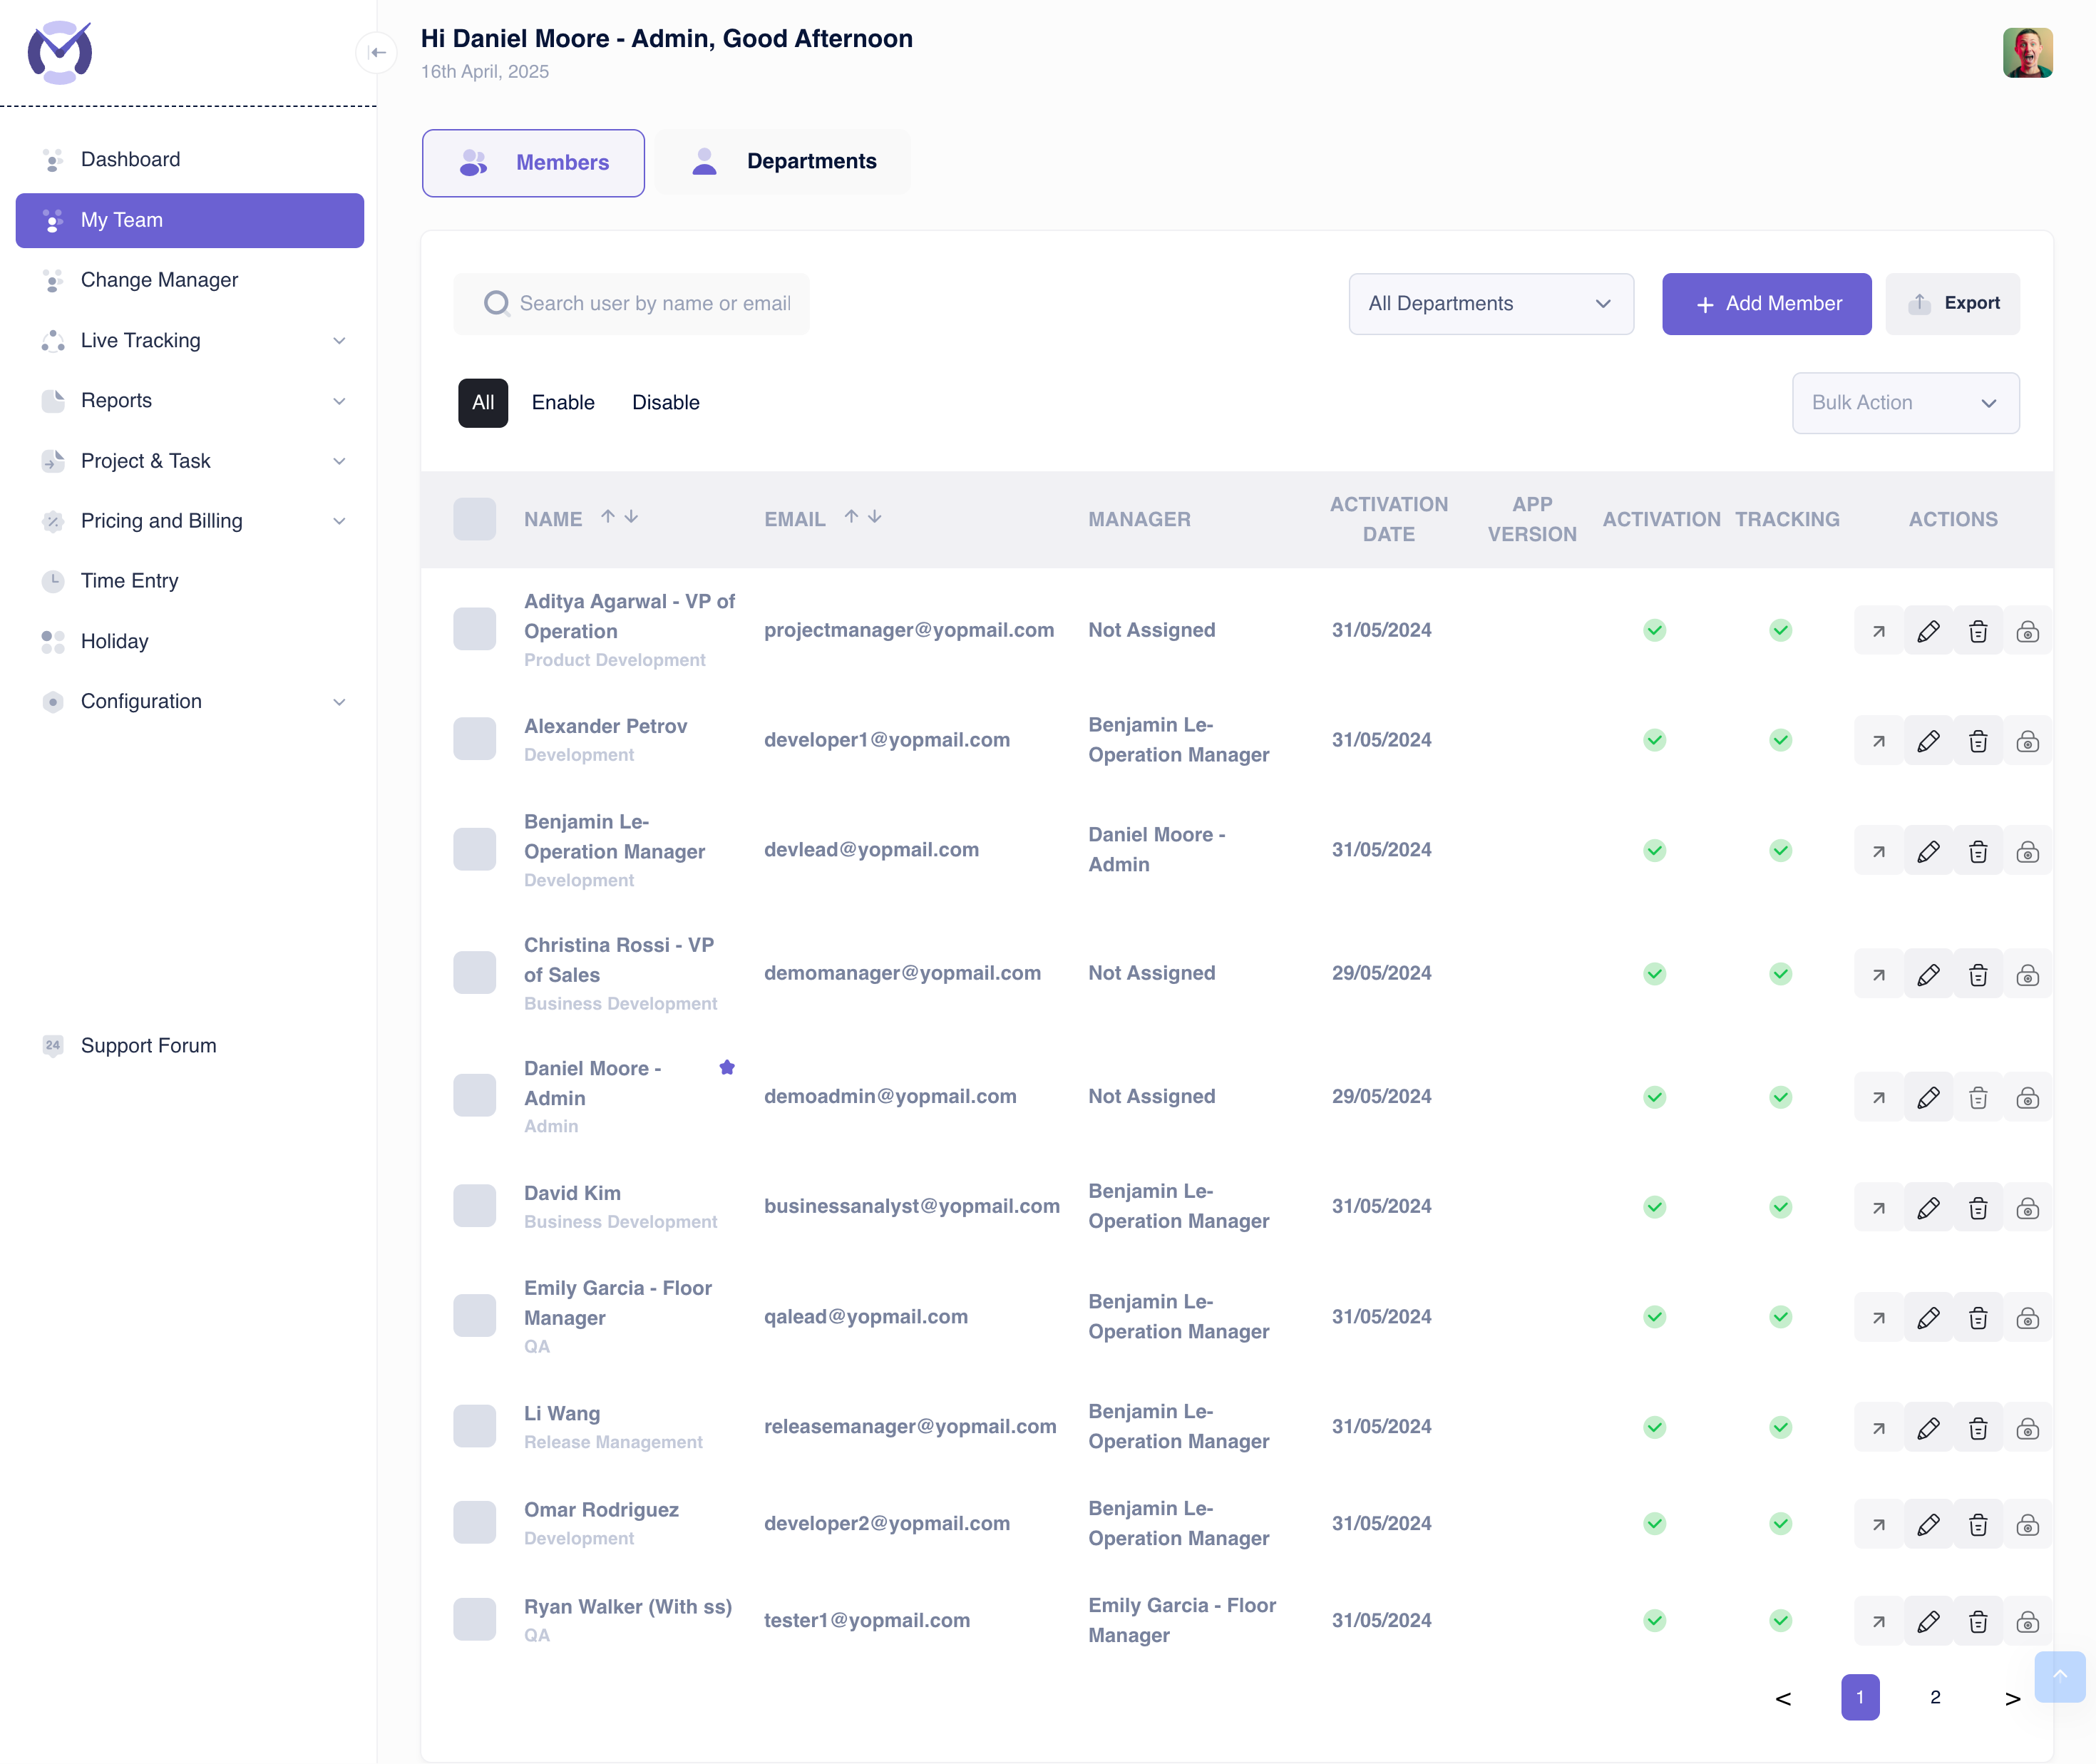
Key Interface Elements:
- Tabs: Switch between the Members list and Departments management.
- Search: Find specific users by typing their name or email address.
- Filters:
- Department Filter: Narrow down the list to show only members of a selected department.
- Status Filter: View All members, only Enabled members, or only Disabled members.
- Actions:
- + Add Member: Opens the form to add members individually (see 'Adding Members Individually' tab).
- Export: Download the current member list (respecting filters) as a file (e.g., CSV, Excel).
- + Bulk Upload: Opens the modal for uploading members via file (see 'Bulk Uploading Members' tab).
- Bulk Action: (Dropdown) Perform actions like Enable, Disable, or Delete on multiple selected members.
- Member Table: Displays detailed information for each member:
- Checkbox: Select members for bulk actions.
- Name: Member's full name and role/title.
- Email: Member's registered email address.
- Manager: Assigned manager for the member.
- Activation Date: Date the member activated their account.
- App Version: Version of the Mera Monitor desktop agent the user has installed (if applicable).
- Activation: Status icon indicating if the account is activated (e.g., green check).
- Tracking: Status icon indicating if time tracking is currently active for the member (e.g., green check).
- Actions: Icons for individual member actions, such as:
- View/Edit Details: (e.g., pencil icon) Modify member information.
- Resend Invite: (If applicable)
- Disable/Enable: Change the member's active status.
- Delete: Remove the member from the system.
- Pagination: Navigate through pages if the member list exceeds the display limit per page.
To add team members one by one:
- Ensure you are on the My Team > Members tab.
- Click the + Add Member button. The form will expand (if collapsed).
- Fill in the details for the member:
- Email address: The member's work email (used for login and invitation).
- Name: The full name of the member.
- Manager: Select the member's direct manager from the dropdown.
- User's access type: Choose the permission level (e.g., User, Manager, Admin).
- Department: Assign the member to a department from the dropdown.
- (Optional) Click + Add New Member to add fields for another member in the same action.
- Use Discard to cancel adding the current member details, or Save to store the details without sending an immediate invitation.
- Click Send Invite to save the member details and send them an email invitation with activation instructions.
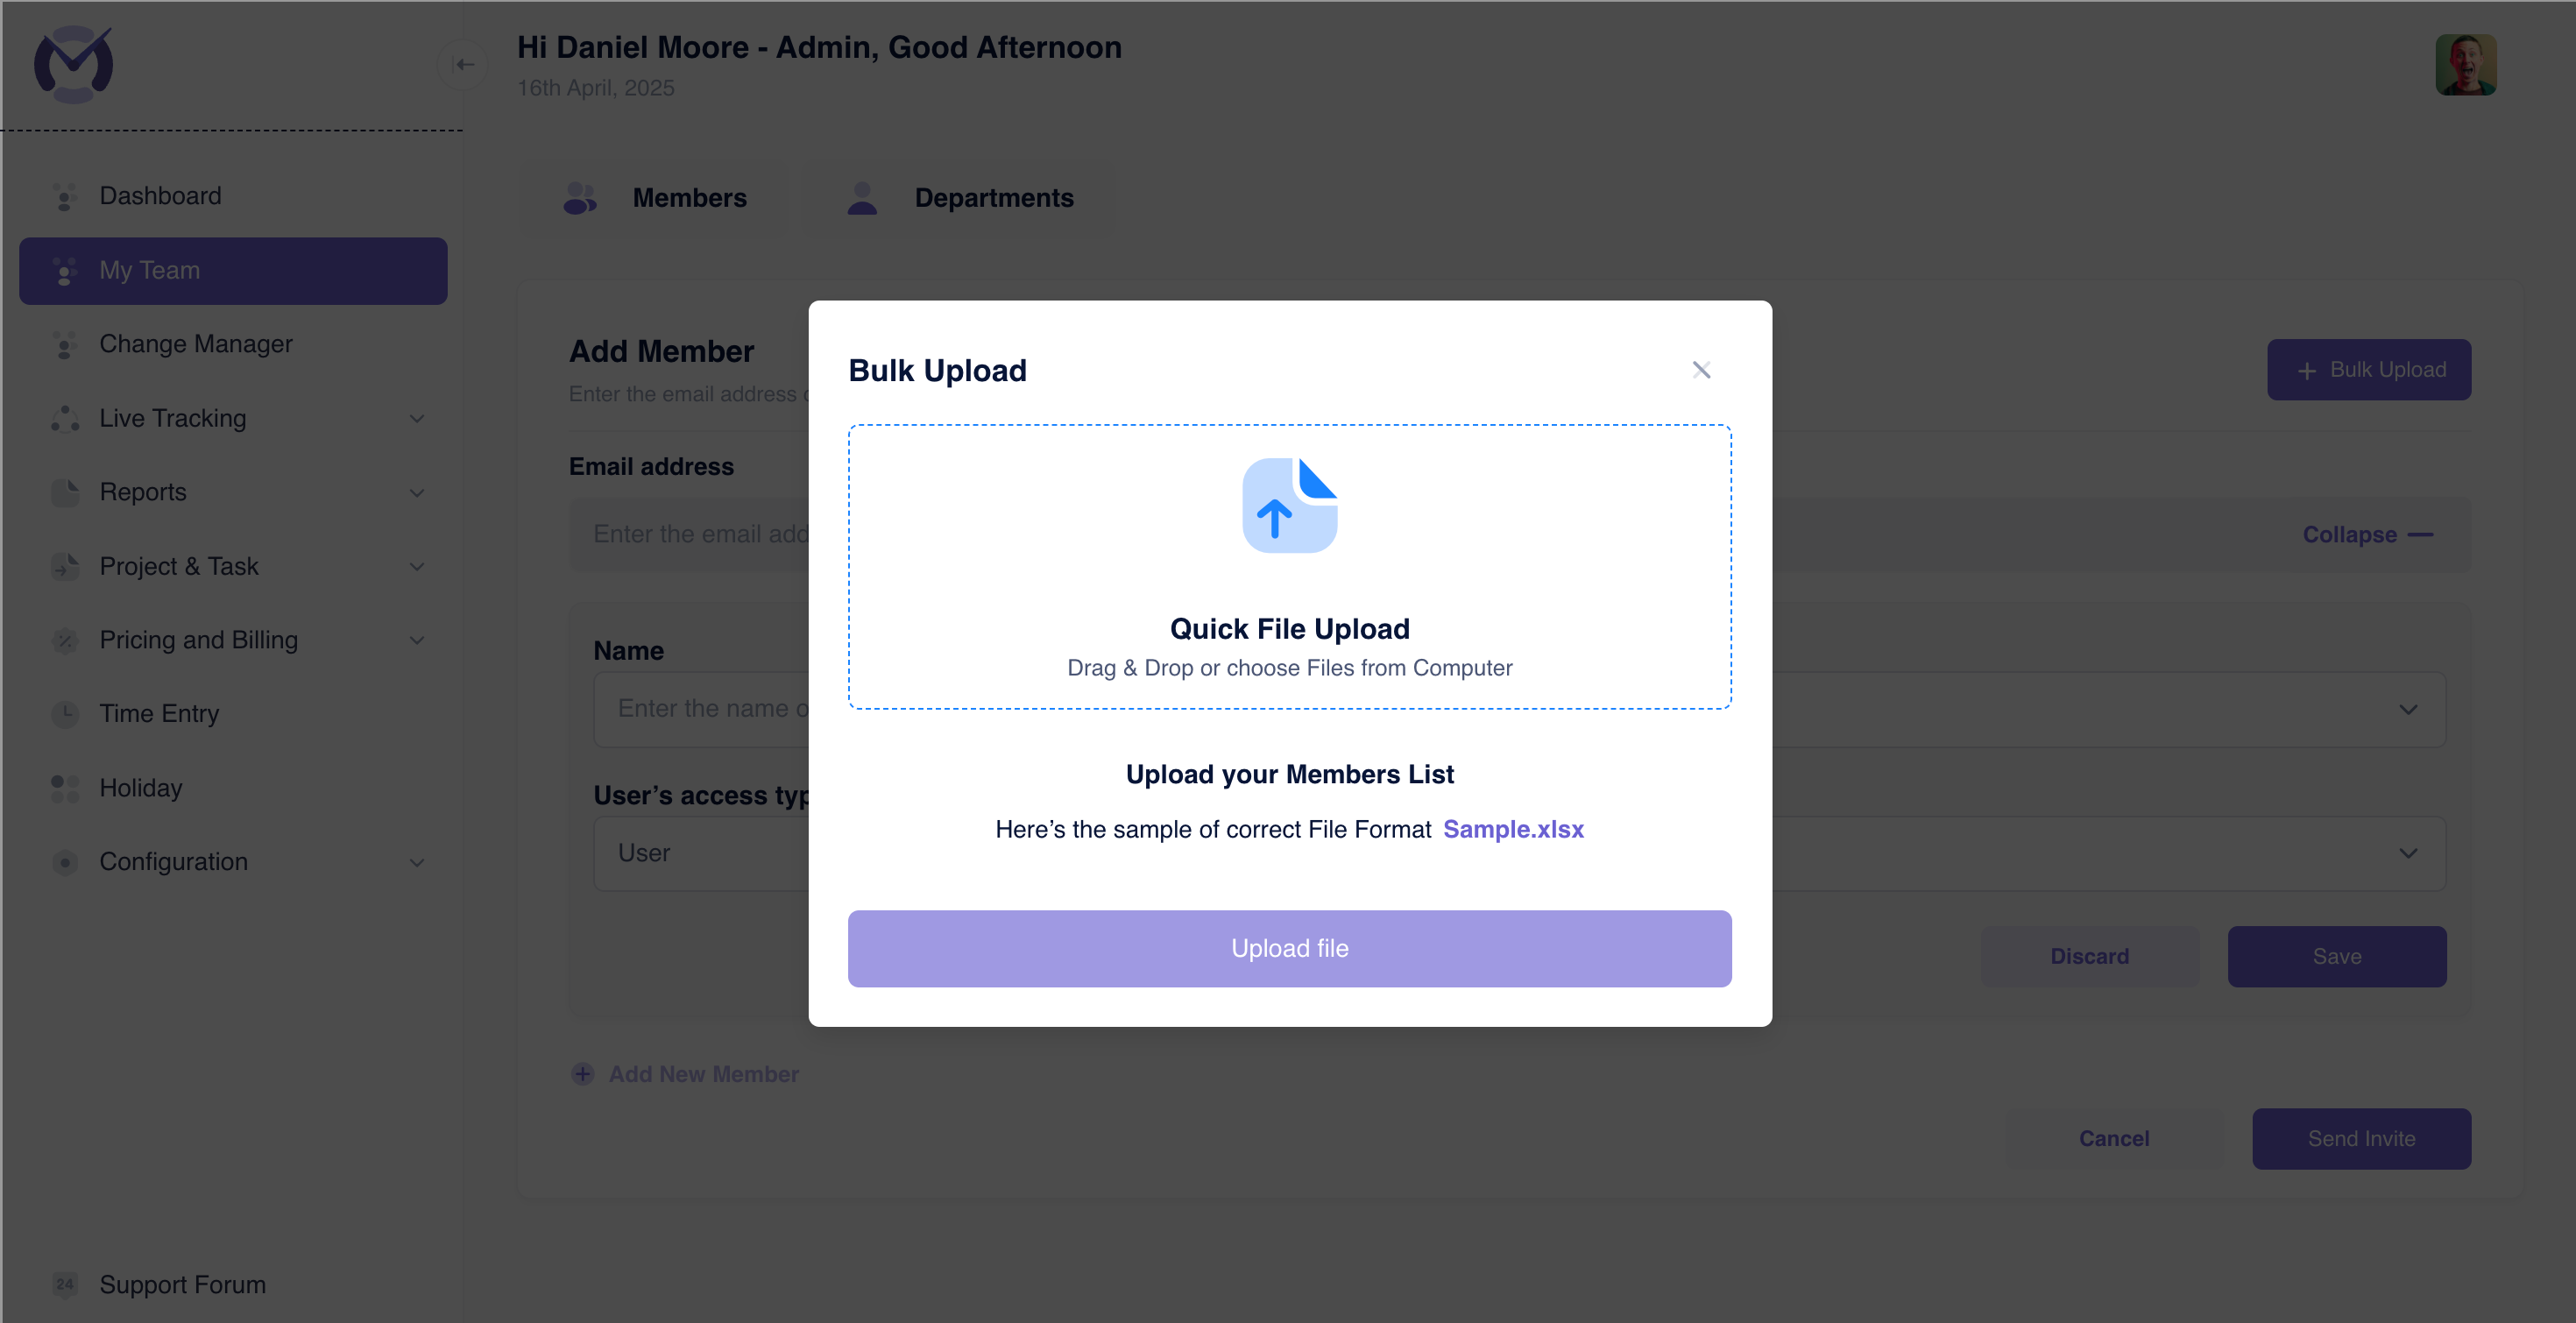
To add multiple members efficiently using a file:
- Ensure you are on the My Team > Members tab.
- Click the + Bulk Upload button.
- A modal window titled "Bulk Upload" will appear.
- Prepare Your File:
- Click the Sample.xlsx link to download the template.
- Fill in the template with your members' details. Required columns usually include Email, Name, Manager ID, and Department ID.
- Upload:
- Drag & Drop your completed file onto the designated area, OR
- Click to choose Files from Computer and select your file.
- Click the Upload file button.
- Review: The system will process the file and report successful additions and any errors (e.g., invalid data, duplicates).
- Successfully added members will receive an email invitation automatically.